How do I use the "PPE Pictures" column in the PPE Table to customize AF labels?
PTW users can customize the Arc Flash PPE Table to add specific graphics (pictures) to display on Arc Flash labels based on the calculated Hazard Risk Category.
1) Run the Arc Flash Study and click on the "PPE Table" button.

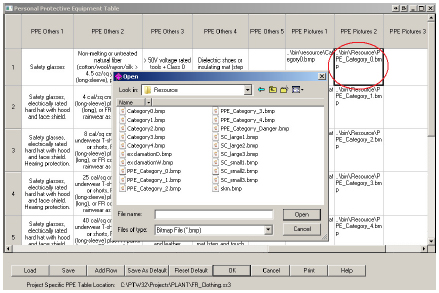
2) Scroll to the far right side of the "PPE Table" to the "PPE Pictures" columns. There are 4 columns available to attach images. Double-click on an empty cell to browse for an image file. This will bring up a window to select the desired image file to the selected PPE Category.
Note: Only .bmp image files can be selected.
3) After all the image files have been selected, click "OK" at the bottom of the PPE Table.
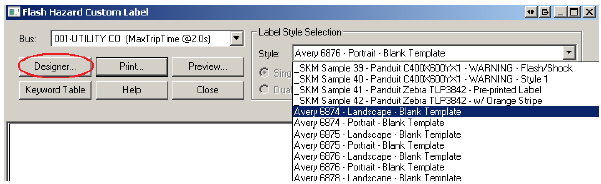
4) Click on the "Custom Label" button on top of the Arc Flash results table.

5) Select a Blank Template from the available Label Styles pull down menu & click on the "Designer" button. Select the "Label Design Detail" button on the next window.
6) Start by adding (checking) the "SKM Label Title 1" field. This attribute will display either "WARNING" or "DANGER" on the printed labels based on the Hazard Risk Category. Notice the Field Layout Settings (X-Y coordinates) that was entered in order to place this field on the top portion of the Label.
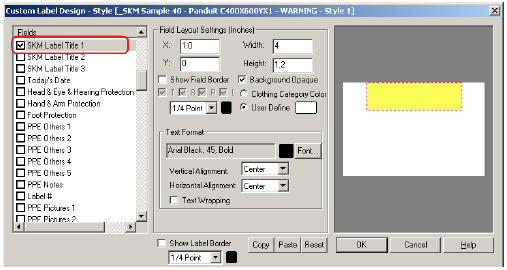
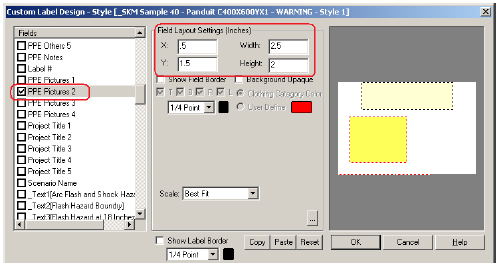
7) Now add (check) the desired "PPE Pictures" field and define the area where the "PPE Pictures" will be placed on the label. Notice the field Layout Settings (X-Y coordinates) that was entered in order to place this field on the bottom left section of the Label.
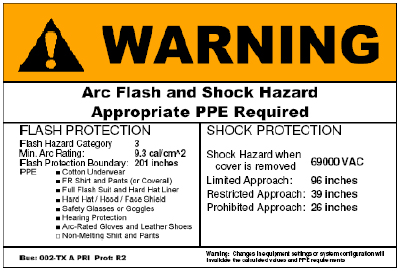
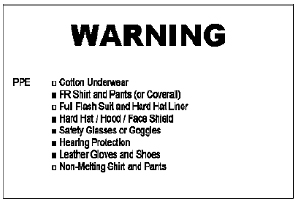
Here's how the label will look so far:
8) Continue adding information to the Label from the available fields to enhance the appearance of the label. Here's an example of a finished label: